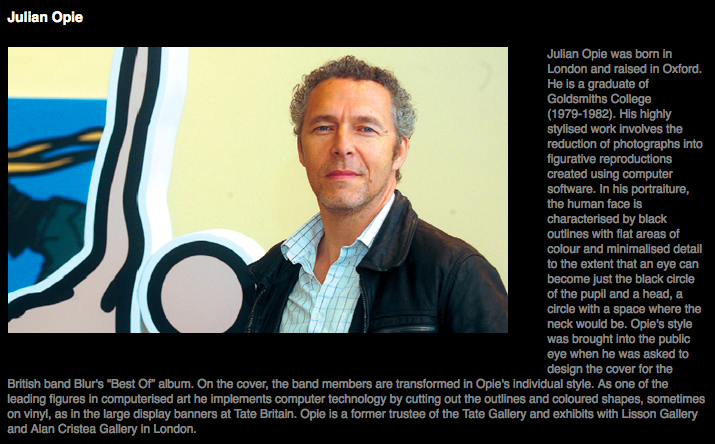
Julian Opie Portraits
Ms. Nava's 7th graders create Photoshop portraits in the style of Julian Opie. View examples and lesson resources below.
|
Purpose:
To create a self portrait in the style of the artist Juian Opie. Procedure:
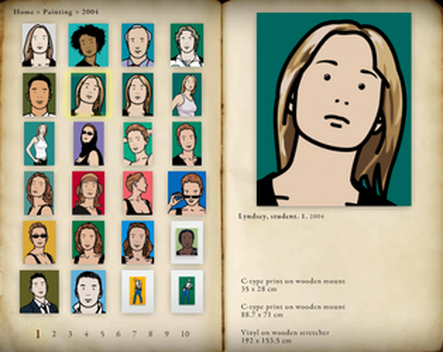
2. What do you notice about the hair in each portrait? 3. What do you notice about the background? 4. Why do you think the artist has created in this style?
To Create your Self-Portrait: 1. Open Photobooth and snap a picture of yourself. Make sure the picture includes your head, neck and shoulders. 2. Drag the picture to your desktop. 3. Open Photoshop 3. Go to File--> New--> U.S. Paper--> H 8.5 W 11--> OK 4. Next, go to File --> Open--> Click on the picture from Photobooth--> OK. 5. Hold down Command + T on your keyboard. Use the move tool to re-size your picture to fit the page. 6. Create a new layer in your layer window. Name it 'trace'. 7. Click on your brush tool and change the size to 17px and choose a hard round brush (second brush style from the left). 8. Next, begin tracing a contour line around the head, hair, neck, and shoulders. Make sure your lines are clean and smooth. 9. Use the zoom tool (or hold down command +) to zoom in to the eyes of your face. 10. Trace a circle around the pupils of your eyes. 11. Zoom into the nostrils. 12. Trace two circles around the nostrils. 13. Draw a contour line between the lips of your mouth. Add simple lines to show the turn of the head or facial expressions. 14. Next, create another new layer and name it 'hair.' 15. Click on the lasso tool and trace the contour of the hair. 16. Use the eye dropper tool to pick up the base color of your hair. 17. Next, use the paint bucket tool and click inside the lassoed shape. 18. To create the highlights and shadows of the hair, use the lasso tool to trace light and dark areas of the hair. Hold shift to select more than one piece and use the paint bucket tool fill the pieces. 19. Once the hair is filled in, go back to the trace layer and fill in face, neck and shoulders using the paint bucket tool. 20. Lastly, click on the background layer in the layers window. Choose a color for the background and click on the background of your portrait with the paint bucket tool. |
|